Hello to all of Danielle's Lovelies. I'm Laurie and I blog over at Laurie's Little Bits of Creativity, etc.
This is my first time as a contributor on Blissful and Domestic and I'm very excited to be able to share this fun project with you all, just in time for the holidays!
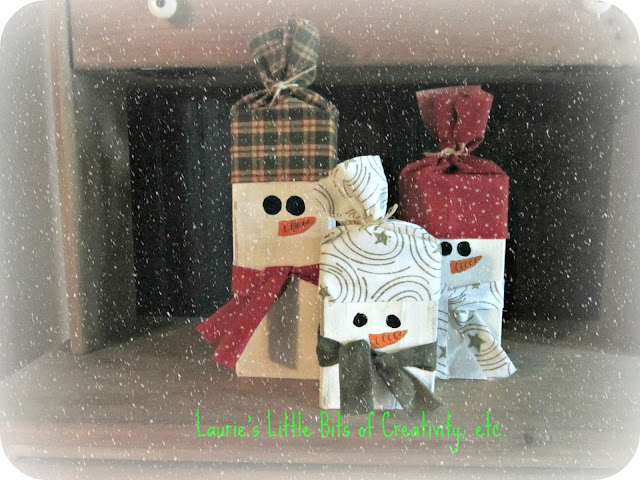
I'm going to show you how to make the cutest
Snowman Family out of 2 x 4 scraps. You are going to need a 2 x 4
or scraps, craft paint in white, black and orange, twine, and fabric
scraps.
First, you need to cut the pieces 9", 7" and 5". The hubs doesn't want me to use his big saw 'cause he thinks I'll cut my fingers off, so he did it for me. If you don't have a saw or want to save time, the big blue or orange home improvement stores will do it for you if you buy the 2 x 4. Some charge a small fee and some do it for free. Guess it depends on where you live. Sand them smooth. I used a small electric hand sander. I sort of rounded the corners, but it's not necessary.
Now comes the fun part...........painting. Paint them using whatever white paint you have on hand. I used Plaid's FolkArt Wicker White 'cause that's what I had. I'm a big believer on using what you already have.
While these are drying, cut your fabric. Again, I used whatever scraps I had. If you don't have scraps you can also buy remnants, or maybe you have a friend/relative that sews and they would be willing to give you their scraps. You could even use old sweaters. For each snowman you will need to cut a piece 1.5" x 18" for the scarf, and another piece 6" x 13" for the hat.
Just wrap the hat piece around the top of the block, leaving about half
of the material at the top so you can tie it off. I used a bit of
fabric glue at the seam to hold it down. There's no need to glue the
hat to the block. I used twine that I purchased for a previous project at the Dollar store to
tie the hat off at the top.
I'm not very artistic as far as drawing goes, but I can make a snowman's
face. I drew it on with pencil and then used black craft paint for the
eyes and orange for the nose. I used a fine tip marker to drawing the
carrot markings on. If you have little ones, let them draw the faces. How cute would that be?!
If the pencil bothers you, use an eraser to get rid of it. It doesn't bother me. I feel it adds to the rustic look. After the white paint dried, I did sand the edges and antiqued it using Plaid's Antiquing Medium in Woodn' Bucket Brown. If you don't like the rustic look then just leave them white.
The only thing left to do was put the scarf on. All I did was fold the
piece of fabric that I had cut in half the long way and used fabric glue
to close it shut. I then tied it around the block and used fabric glue
in front and back to hold the scarf on so it wouldn't slip down. You
may have to trim the scarf for the baby. I did trim the top of the hat a
little too. That's it. This project took me just a couple of hours.
Aren't they adorable?
I would love to have you come visit my blog. I have lots more to share, such as my white feather Christmas trees. You could also check me out on FACEBOOK, TWITTER and PINTEREST. When you stop by please be sure to leave a comment so I know that you stopped in.
Hope to see you soon!
Thank you Danielle for allowing me to share on Blissful and Domestic.
HAPPY HOLIDAYS!


These are adorable. Merry Christmas
ReplyDeleteThese are so stinkin' cute! What a great project to make out of random extra stuff you have around the house. Love it.
ReplyDelete<3 Danielle
Goodwillista.blogspot.com
So adorable!
ReplyDeleteThank you Danielle for letting me share my snowmen on your blog. Happy Holidays to you and your beautiful family!
ReplyDeletehttp://www.laurieslittlebitsofcreativity.com/
Just too cute!!!
ReplyDelete