Hiya all! Can you believe it is Thursday already! This week is zooming past. Before I get into our guest post today I wanted to quickly thank the wonderful ladies from Delightful Order and Chicka es Artistica for featuring my Simply Fancy Updo. You totaly made my day!
Now onto our fabulous Thursday guest blogger...
Today we have Anshu, from Blooms and Bugs. Anshu's blog is full of a bunch of fun crafts and she has an etsy store too! You definitely want to check her out. Today Anshu is sharing a fun necklace tutorial today. I am excited for this one because I have seen these all over blogland and now maybe I willl actually make one. I can't believe how simple they are.
![]()
What you need:
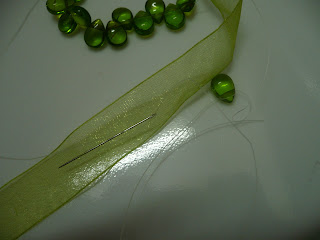
Some beads: about 15-20 depending on the size. I used teardrop beads simply because I didn't have
any round ones in my stash. In the end though they arranged themselves in this very pretty and unique look.
You can try with whatever you have. I have seen many necklaces made using the round beads and they look beautiful too.
Ribbon: Satin or Sheer organza ( ~2 yd - there will be leftover)
I personally don't think grosgrain or satin ribbon would look as good, but you can play around with your choices and choose whatever you like.
Plastic thread: To thread beads and ribbon into a necklace. I used it because its more stable. I highly recommend it.
Some Tulle scraps. Optional

Mark 15 inches from one end of ribbon. This is where you will start adding beads to the ribbon. Now thread a needle with the plastic thread and tie a knot at the end. Now thread one bead with this thread. Once the needle is out of the bead, wrap it around and thread the same bead one more time. What we're doing here is trying to use the bead as a knot. For more stability loop your thread once through the loop over the bead as well.

Now make a 3/4 inch long running stitch on the ribbon starting at the 10 inches mark you marked earlier.
When the needle comes out at the end of this running stitch thread another bead, make another running stitch about the same length as earlier, thread another bead, make another running stitch.


What the above step will do is to get your ribbon to bunch up between your beads.
 Repeat this cycle and thread about 10 beads. At this point pull your thread and gently bunch up the ribbon and beads as close as possible.Now check the whole thing against your neck to see if you are happy with
this size or you want more. If you need more keep adding the beads and making running stitches as shown earlier.
When you reach at the end pull the thread gently so the ribbon bunches up between the beads. Now you can tie a knot after wrapping around the bead again ( as we did in the beginning) and then sewing it back to ribbon.

Snip off any extra thread. Now tie the whole thing in your neck with a bow in the back. Snip off any extra length of ribbon.
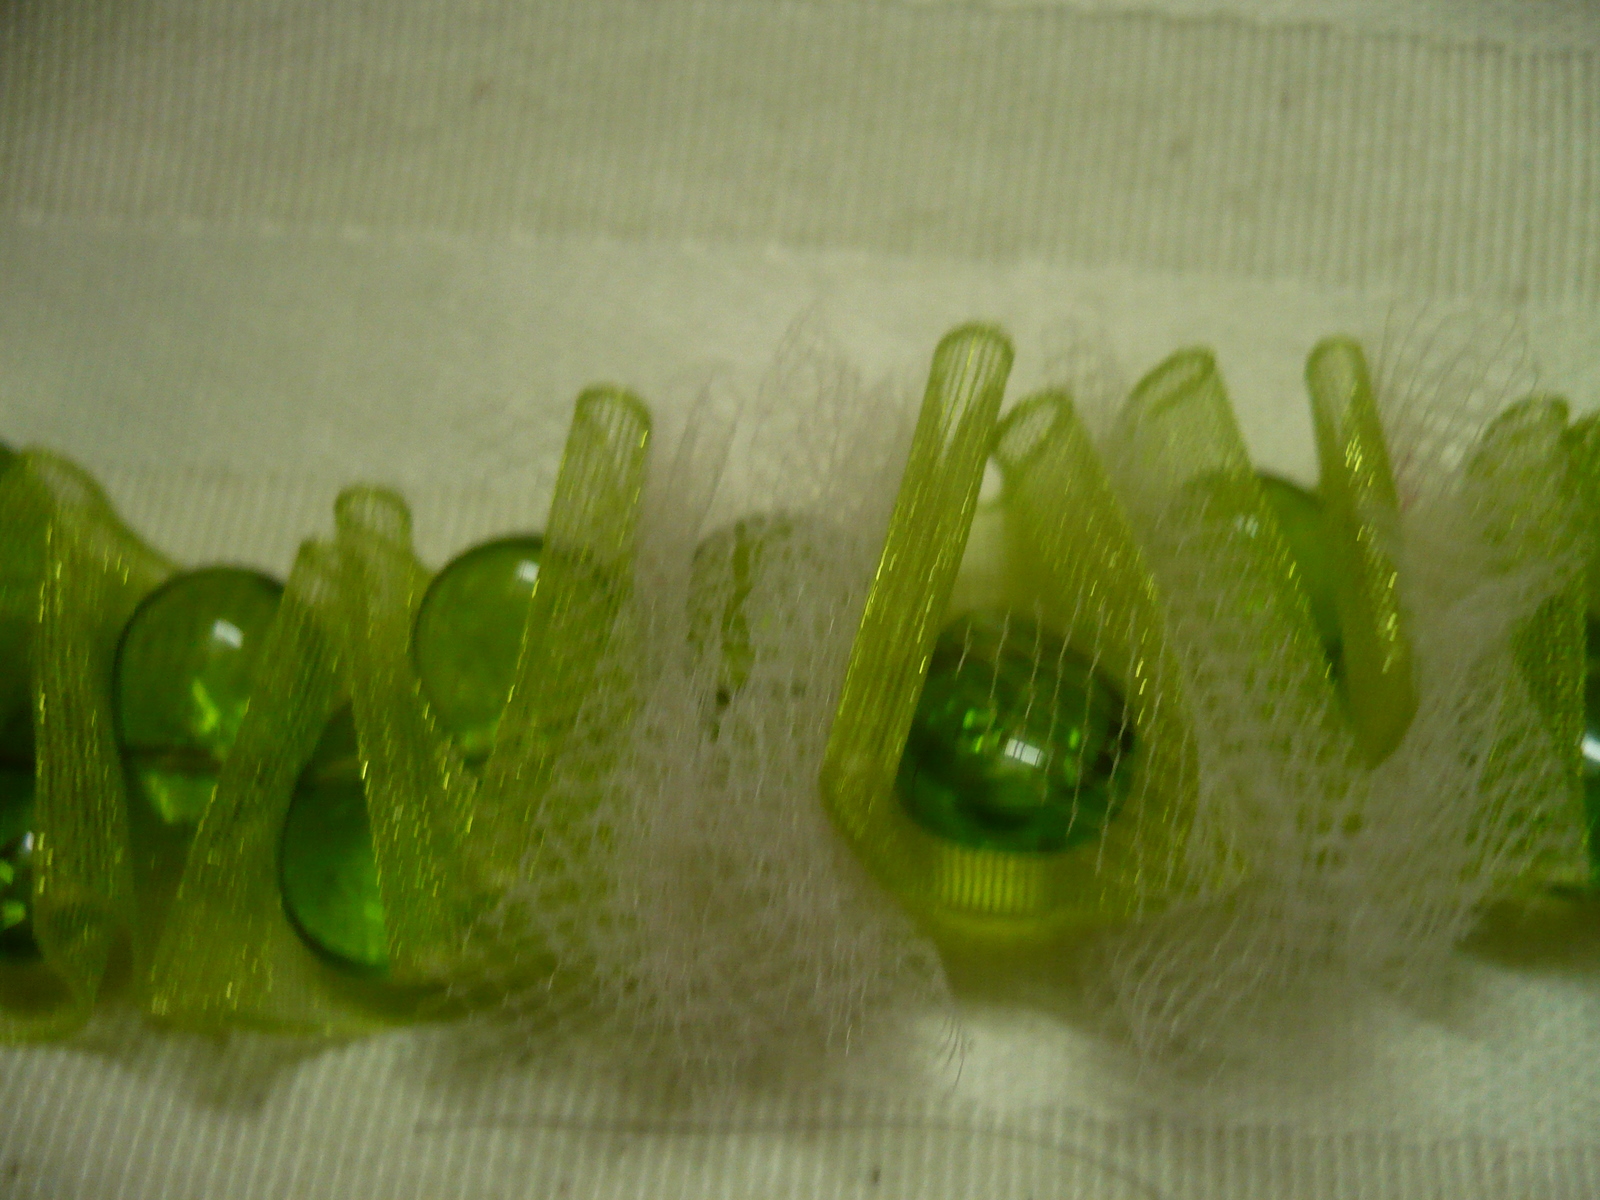
If you had used tear drop beads they will arrange themselves in a fashion where one bead is up and next bead is down and the next bead is up again. If you notice a couple of stray beads just arrange them with your hand, because this is the most natural position for the beads to settle they stay in this position.
Your bead and ribbon necklace is ready.

Tie it behind your neck by making a bow and show off.
Options
You can spice it up more with these options:
1. After threading every bead make 2 running stitches instead of one. If the ribbon is pretty it will show more this way.
2. Cut some small tulle strips ( about 3 inches long and about the same width as the ribbon). Now thread the bead, make a running stitch on the ribbon and fold your tulle strip in an accordian fold and thread the needle through it. Make another running stitch on the ribbon. If you have matching tulle this will soften the look and give the necklace a more romantic touch.
![]()
Now onto our fabulous Thursday guest blogger...
Today we have Anshu, from Blooms and Bugs. Anshu's blog is full of a bunch of fun crafts and she has an etsy store too! You definitely want to check her out. Today Anshu is sharing a fun necklace tutorial today. I am excited for this one because I have seen these all over blogland and now maybe I willl actually make one. I can't believe how simple they are.
Blog Meet Anshu

What you need:
Some beads: about 15-20 depending on the size. I used teardrop beads simply because I didn't have
any round ones in my stash. In the end though they arranged themselves in this very pretty and unique look.
You can try with whatever you have. I have seen many necklaces made using the round beads and they look beautiful too.
Ribbon: Satin or Sheer organza ( ~2 yd - there will be leftover)
I personally don't think grosgrain or satin ribbon would look as good, but you can play around with your choices and choose whatever you like.
Plastic thread: To thread beads and ribbon into a necklace. I used it because its more stable. I highly recommend it.
Some Tulle scraps. Optional

Mark 15 inches from one end of ribbon. This is where you will start adding beads to the ribbon. Now thread a needle with the plastic thread and tie a knot at the end. Now thread one bead with this thread. Once the needle is out of the bead, wrap it around and thread the same bead one more time. What we're doing here is trying to use the bead as a knot. For more stability loop your thread once through the loop over the bead as well.

Now make a 3/4 inch long running stitch on the ribbon starting at the 10 inches mark you marked earlier.

When the needle comes out at the end of this running stitch thread another bead, make another running stitch about the same length as earlier, thread another bead, make another running stitch.


What the above step will do is to get your ribbon to bunch up between your beads.

this size or you want more. If you need more keep adding the beads and making running stitches as shown earlier.
When you reach at the end pull the thread gently so the ribbon bunches up between the beads. Now you can tie a knot after wrapping around the bead again ( as we did in the beginning) and then sewing it back to ribbon.

Snip off any extra thread. Now tie the whole thing in your neck with a bow in the back. Snip off any extra length of ribbon.
If you had used tear drop beads they will arrange themselves in a fashion where one bead is up and next bead is down and the next bead is up again. If you notice a couple of stray beads just arrange them with your hand, because this is the most natural position for the beads to settle they stay in this position.
Your bead and ribbon necklace is ready.
Tie it behind your neck by making a bow and show off.
Options
You can spice it up more with these options:
1. After threading every bead make 2 running stitches instead of one. If the ribbon is pretty it will show more this way.
2. Cut some small tulle strips ( about 3 inches long and about the same width as the ribbon). Now thread the bead, make a running stitch on the ribbon and fold your tulle strip in an accordian fold and thread the needle through it. Make another running stitch on the ribbon. If you have matching tulle this will soften the look and give the necklace a more romantic touch.
Play around with these options by using them for the middle 2-3 beads and threading the rest as the initial method.
Hang a pretty pendant in the center of the necklace by threading through it while you're making the running stitch on the ribbon.
There are so many variations here that you're limited by only your creativity!
Now go make one, make many!
-Anshu
-Anshu


No comments:
Post a Comment
Blissful and Domestic is a place for inspiration and encouragement. Please remember that when commenting. I read all comments and am thankful for them :)
All comments are moderated. Your comment will appear soon. ;)
I reply to all comments in the comment section, so check back for answers to your questions. You can also email me at blissful_and_domestic@yahoo.com :)
Note: Only a member of this blog may post a comment.