
Before I start into our post for today I have a quick side note.....
Did you all know that Breaking Dawn is coming out in like 2 weeks? Yes, in case you didn't know, I am a die hard Twilight fan. I admit I am all for Team Edward. I don't get too crazy, but 1 time a year (whenever the movies have come out to theaters) I stay out late and hit the midnight showing with my sisters. Can't wait for this one!! It will be insane!
Now that I have had my twilight moment (I couldn't help it I just saw a preview), I am excited to introduce you all to Jill.
Jills blogging home is Two Yellow Birds Decor and she is my newest bloggy friend. She's super cute and super creative! Jill is going to continue our Fall Craft Week Theme with an awesome craft and fun giveaway.
Blog Meet Jill
-----------------------------------------
Hello Everyone!! I am so excited to be guest posting here at Blissful and Domestic today. Thank you so much Danielle for having me! Danielle and I recently became blogging friends. She is amazing!! I love reading all the new things she has on her blog! Before we get started I would like to introduce myself.

I am Jill and my home is at Two Yellow Birds Decor. You will find plenty of crafts, homemade decor, and recipes. I love to make cute decor for my house for cheap. Luckily my husband is my super handy man and helps me out with a lot of the things I do. I love being able to share my crafts with all of you!!
**Now Lets Get Started**
Today I am going to be showing you how to make a super cute wall hanging for Thanksgiving since its right around the corner!!
To start out I got a piece of wood that is 5 1/2"x11". I painted it white.

As you can see I did not make it perfect when I painted it. I did this for a reason. Next I stained it and by leaving the wood showing places around the edge it gives it an antiqued look.
I used Early American to stain the whole thing. When I went over the paint it made it more of a light brown which is what I wanted. That is why I wanted to use white paint.

As you can see from the picture, I also went heavier in some areas on the white paint to give the antiqued look on that as well.
While that was drying, I worked on the flowers that are going on it. These are all flowers made out of felt. I got fabric that are fall colors. There is one flower and a fan made out of burlap.
Here is the FIRST set of flowers:

To Make The Dark Brown Flower:

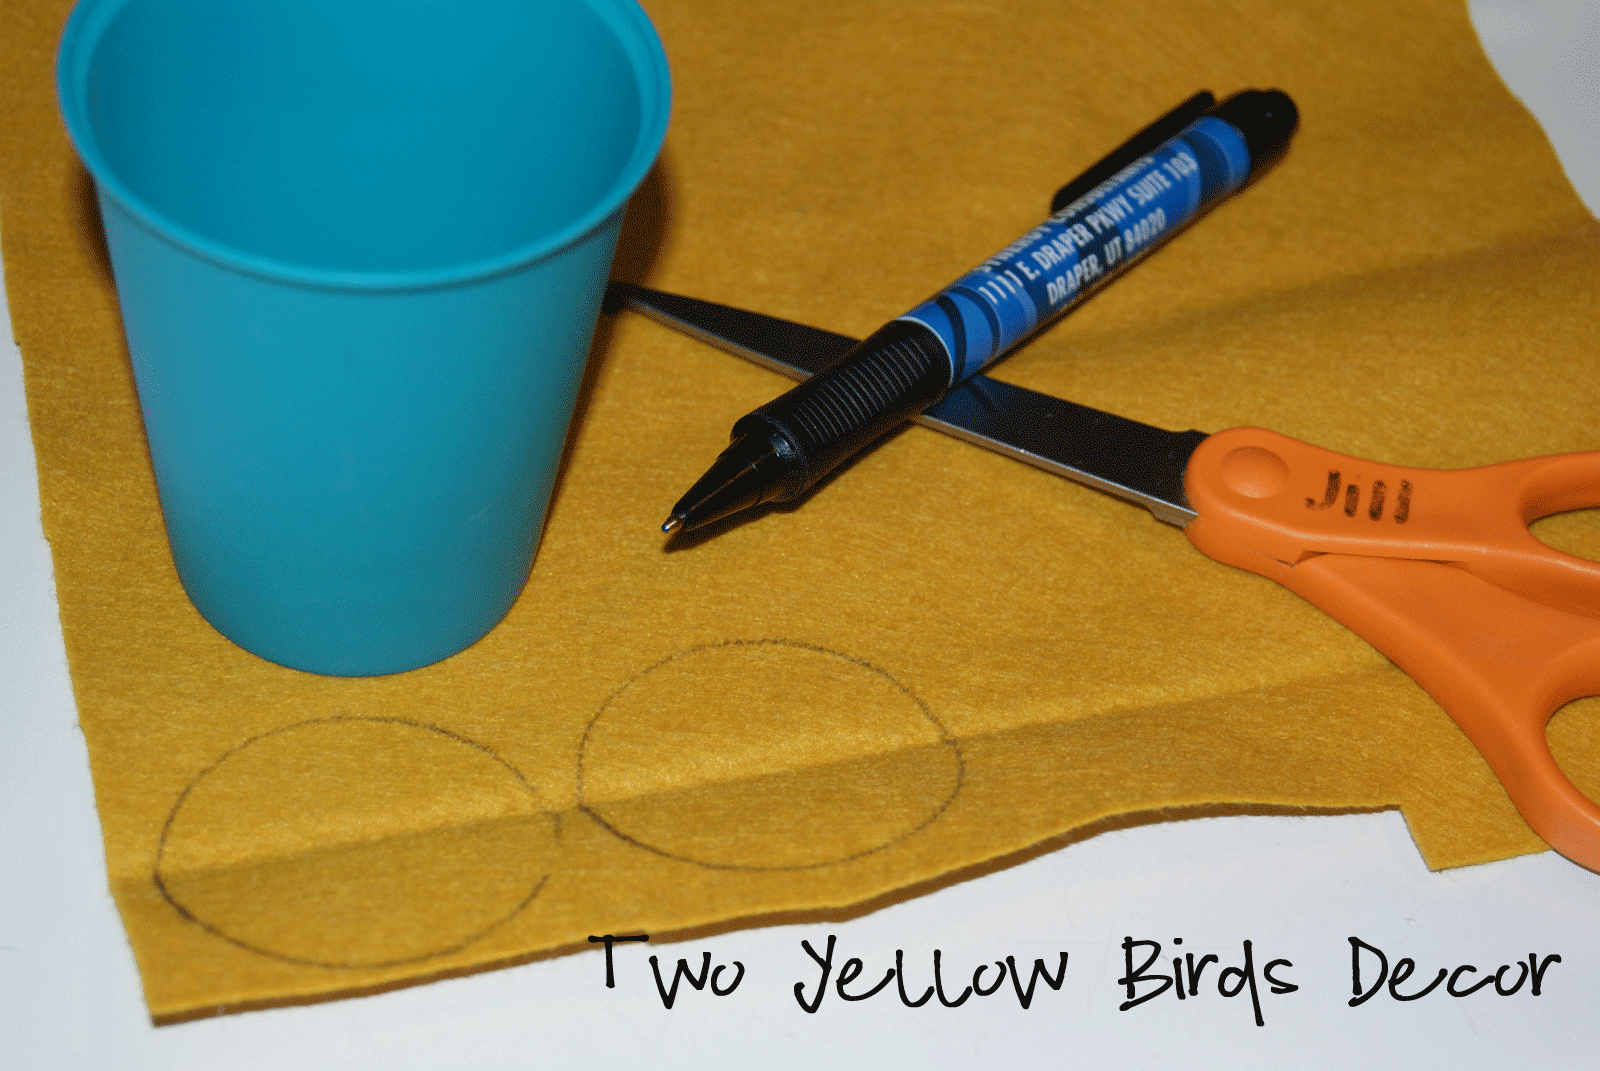
I needed a circle shape so I took a small cup and traced it on the felt. It is hard to see but I traced 5 circles. Then I cut each of them out.

I saved one circle as a base for my pedals, but with 4 circles you will follow these steps:
Fold the circle in half. Put a little dab of hot glue in the middle of the fold.
Then fold that in half again. Put a dab of hot glue in the bottom of the fold by the point.

Next, I hot glued that to the circle that I saved at the base.

I did that with all 4 circles going around the base circle all the way around.
In the middle I put the mustard yellow circular flower that I will show you how to make next. The light brown flower next to the dark brown one is also this same flower.
To Make The Circular Flowers:
I took a big tupperware bowl and traced it. I wanted it bigger so I needed something circular and that's what I found!

After I got that cut out, I started cutting in a circular motion around the circle.

I did this all the way to the middle of the circle. I did cut out a little circle right in the middle as you see here...

Then starting in the middle of the circle at the end I rolled it up adding dabs of hot glue every few turns to help it stay in place.

I put a big dab of hot glue when I got to the end to secure it.

To Make The Burlap Fan:
I cut a strip of fabric about 1" wide by 7" long.

I then folded it accordion style. To secure it, I stitched some thread through it.

Here is the SECOND set of flowers that are on it:

The LITTLE BROWN FLOWER is the same flower as the circular flowers I showed how to make above. I just didn't make the circle as big so it would be smaller.
The CREAM FLOWER is made the same way as the dark brown flower above. I just hot glued a cute brown button in the middle.
To Make The Mustard Yellow Flower:
I Followed The SAME DIRECTIONS as the dark brown flower above. I wanted it smaller then I did the brown one so I traced the bottom of the cup I used for the bigger one above. For this flower I needed 6 circles.
After I traced them I cut them out. I did the same steps as above. Folding the circles in half and half again. I got the 4 circles hot glued around the circle for the base. To finish this one off, I did the same thing with the 6th circle and then just put a big dab of hot glue right in the middle of the flower and stuck that in.

To Make The Burlap Flower:
I wanted to try something new and make this look like a rosette. It is definitely hard to see it, but it still looks cute!
I cut a strip of burlap, 1"x13". I then tied a knot at the end of one side.

Then I rolled and twisted the rest of the burlap around the knot adding dabs of hot glue every few turns so it stays in place.

I put a big dap of hot glue when I got to the end to secure it. To finish it off I added two buttons, a light brown and dark brown. It just gave the finishing touch!
Then I hot glued all those to the board. This is the full picture of what it looks like...

After I got these on I was able to measure how big I wanted my words to be. I cut out the saying "Give Thanks" in dark red on my Cricut. I used the font, Wish I Was Taller, found here.

To be able to hang it up. I put "V" hangers on the back. I am not sure of their real name, but that what I call them. This is what they look like.

I then cut 3 strips of brown tulle the same length. I wanted it to look big and full. I measured it by the amount I wanted hanging above the sign. I tied the ends to the hangers.

Here is the Give Thanks Wall Hanging All Done:


There you have it! A super cute, super fun Thanksgiving Decoration. Thanks again Danielle for having me today!! For other cute decorations hop on over to my blog Two Yellow Birds Decor. I'd love to have you!!
Since this month is Thanksgiving I have many things I am thankful for, but one that I want to tell you is that I am THANKFUL for ALL OF MY LOVELY READERS!!! Because of that I am going to be GIVING THIS AWAY!!! Come over to my blog and enter for a chance to win this sign!
The Giveaway will END NOVEMBER 15 at 8:00 AM.


It is really cute! :)
ReplyDeletelove it!!
ReplyDeleteIt looks great!! Thanks again for having me!
ReplyDeleteJill @ Two Yellow Birds Decor
It looks great!! Thanks again for having me!
ReplyDeleteJill @ Two Yellow Birds Decor