Welcome to Day 11 of our Halloween Countdown.
Are you guys having fun crafting and having
some pumpkin fun? I know I am.
I just can't get enough. Oh and how awesome were those
creepy critter boxes yesterday? I swear you ladies always
surprise me with your awesomeness.
And guess what it is happening again today...
Today we have Adrianne from Happy Hour Projects. Heard of her?
If not you should check her out.
All her projects are simple and fun to do and all under an hour.
Love it!
So without further ado..
Blog meet Adrianne
--------------------------------------------

Hey mamas, I am so glad to join you here at Blissful and Domestic! My name is Adrianne and I hail from Happy Hour Projects, where I bring you quick and simple projects you can normally do in an hour or less.
Over at Happy Hour, I do a lot of sewing and fabric projects. But in trying to come up with creepy and creative Halloween Decor, I took a look at what I had on-hand. I do that a lot... it's a bit of a theme for me, use what you have. Crafting can get very expensive when you're always running out for things, so my focus is always on things that many of us have right in our craft bins already.
The result? A creepy, personalized sign that we can display for the neighborhood trick-or-treaters. :)

It's a Mod Podge and canvas project (and if you don't have Mod Podge in your craft bin, you should!!) If you don't have canvas, you can secure one pretty inexpensively (mine was the leftover from a 2-pack at Hobby Lobby for $3.99 - less my 40% off coupon).
Now, on to the how-to!
Distressed Halloween Canvas
Time: 45 mins. to an hour total, from start to cleanup.
(10 minutes working time with 15-20 minutes of drying time between coats.)
Supplies:
- Mod Podge
- Paintbrush
- Printable or other paper design
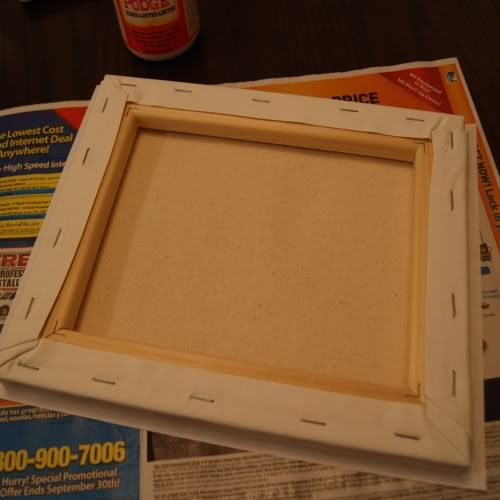
- 8x10 canvas (or whatever size best suits your design) Newspaper/plastic/something to keep your work surface protected
- Sandpaper if you plan to distress your design
With everything on-hand, all I needed to do was score myself some sort of printable to get started, which was actually trickier than I anticipated. The idea I had in mind didn't seem to exist, so I cobbled my own design together in my generic, non-photoshop editing software. It... looked a bit sad at full-page size. I started getting discouraged, until I thought, you know, it's Halloween... why not just distress it to cover up the mis-matched pixels? But - find your own style, and see what works for you. You may opt to skip the shabby-look, but I will show you how I accomplished it.
First of all, because I knew I'd be abusing it, I just printed it off from my laser printer at work. Cheap paper, and less-than-crisp black ink. Worked beautifully for me.
Cover your canvas with a moderate amount of Mod Podge. Don't forget to do the sides. I have no way of measuring how much I used, and I couldn't really show you because it was white-on-white. But make sure there are no dry spots while also not letting it look thick. To center my design, I put the printable upside-down and centered the canvas on top.
I flipped up upright and coated the front with Mod Podge.
Here is where I began to think this might be a terrible idea after all. The paper seemed soaked and it got wrinkly. But I reminded myself, shabby. And also if this project bombs, I don't have any additional money into it. (But to my surprise, it dried just fine, so it turns out - don't panic.)
Then I folded the corners down, much like wrapping a gift.
Now - check your laundry, return a phone call, get something to eat - whatever it takes to leave it alone and not impatiently keep checking whether it's dry. I only used one coat of Mod Podge and I think it turned out fine, but if you normally do another on your Podge-projects, then go for it.
Once it was dry, I started sanding it lightly. It turns out, you have to sand a bit harder than "lightly", so I really had to abuse it a bit. I had my best success pressing up from the bottom of the canvas in various places, and sanding against my hand or fingers. When you're going for a distressed look, it's good if it's a bit uneven.
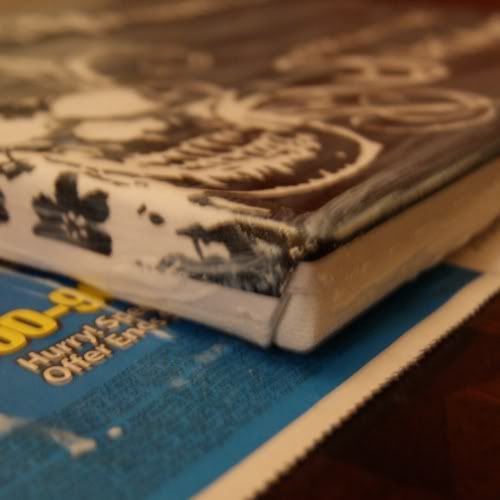
Any little wrinkles that may have survived can actually work to your favor. Here's a close-up of the worst of my wrinkly area, and I rather like how it turned out:
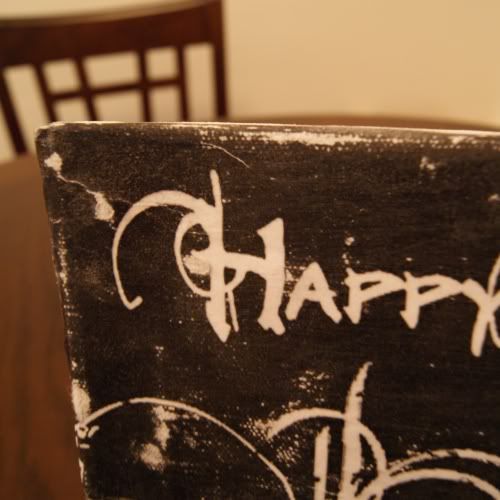
Keep sanding until you're satisfied, and that's it!
This is a really versatile project. You could use scrapbooking papers and punches, wrapping paper, stencils, stamps, have your kids create some art on regular printer paper - you name it. Have fun!!
Happy Halloween from Blissful and Domestic and Happy Hour Projects!
~Adrianne


This is so awesome and so easy! Love it! Thanks for sharing!
ReplyDeleteAwesome job! That is such a cool looking sign!
ReplyDelete