Welcome Ladies and Gents to Day 10 of the Countdown to Halloween! I hope you guys are loving all the spooky crafts and recipes, which have been shared so far. Today we have an awesome guest blogger. Katie is a designer for Bowdabra, like me, and has a fun blog called Sew Woodsy. She has a fun tutorial to share with us, and once you read it seriously check out her blog. She is a Halloween Fanatic and has some great tutorials.
Blog Meet Katie
-----------------------------------------------------------------

Hi I'm Katie from Sew Woodsy. For those who are not familiar with Sew Woodsy its a compliation of projects that my husband, aka. Mr. Woodsy, and I have completed. Whether it be home renovations, DIY, holiday decor, or crafts. We typically work on projects together (well maybe not all projects but a good majority of projects). When Danielle asked me to be a guest blogger for her Halloween series I knew I couldn't say no. I absolutely LOVE Halloween. You can take a look at all our awesome Halloween projects we've completed in the past year. Now on to this creepy cool project that your family and friends will adore!
{Tutorial} Creepy Critter Boxes

Last year, I got the idea for this project thanks to Tatertots and Jello with her {Creepy} Halloween Specimen Art tutorial, and then I saw the awesome "Glitter Spider Art" made by Ameroonie Designs. I knew I needed to make a version of my own, and I wanted to make it interchangeable for the holidays. I used foam core as the backing, so that I can easily take the creepy critters out and replace them with a new background or scene. This project maybe took me 30 minutes at most, and added a nice touch to all the rest of our Halloween decor!

Supplies Needed:
2 t-shirt shadow boxes ($4 each at Michaels)
burlap
2 pieces of foam core
hot glue gun & glue
stapler
scissors
creepy critters
2 t-shirt shadow boxes ($4 each at Michaels)
burlap
2 pieces of foam core
hot glue gun & glue
stapler
scissors
creepy critters


1. Measure out enough burlap to cover the front. You'll see I had to use 3 pieces to cover the white foam core. You will want to staple each piece to the foam core.
2. Next you will want to arrange your creepy critters accordingly, and then hot glue them on to the burlap.
3. Place the foam core in the shadow box *the creepy critters should touch the glass or come close to touching the glass. Seal up the box, add a picture frame hook if necessary, and hang them up!
Here is the finished project!
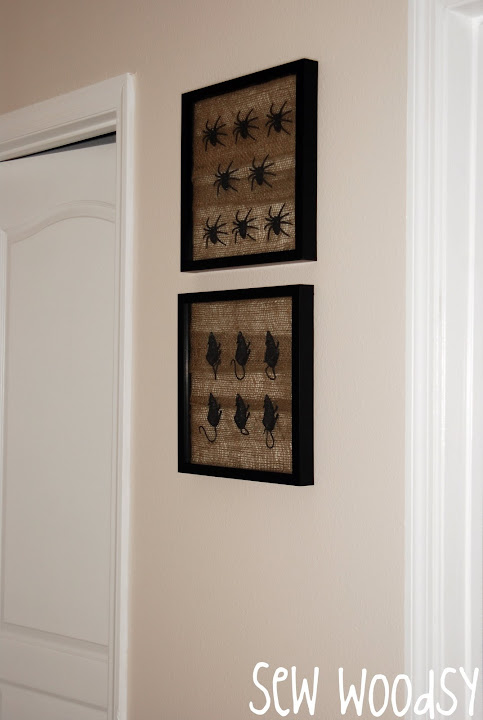
We placed them in between our bloody guest bathroom and laundry room!
Thanks Katie!
I hope you guys are loving my countdown to Halloween.
Come back tomorrow for some more spooky crafts and recipes!


Thanks for having me over today!
ReplyDelete